

Yogurt is a creamy, nutritious food enjoyed by millions around the world.
Packed with probiotics, calcium, and protein, yogurt supports digestive health, boosts immunity, and strengthens bones.
Although store-bought options are convenient, homemade yogurt provides fresher flavor, customization possibilities, and cost savings.
This guide will walk you through the process of creating delicious yogurt right in your kitchen.
More Homemade Recipes Follow At End Of Article 👇🏼
Homemade Yogurt: A Step-by-Step Guide
To make yogurt at home, you’ll need whole fat milk, such as cow’s or even goat milk. You can also make a non-dairy version using almond milk or your favorite non-dairy plant based milk.
You will also need a yogurt culture. You acquire this from plain store-bought yogurt with live cultures or a cultured powdered yogurt starter (purchase on-line, such as on Amazon or at your local Whole Foods market).
Equipment Needed
Saucepan for heating the milk.
Thermometer to accurately measure milk temperature.
Spoon for stirring. Either plastic or wooden.
You will need an Incubator, such as your oven and a ceramic crockpot insert (one that is able to hold 4 cups of milk) for maintaining warmth during incubation.

Jars or Containers for storing yogurt.
Step-by-Step Process
Begin by selecting your milk. Full-fat milk will yield a creamier yogurt, while low-fat milk produces a lighter version.
Choose a yogurt starter. Using store-bought yogurt is convenient (a thick yogurt is the best choice, such as Greek yogurt) but powdered starters offer a broader range of bacterial strains.
Heating the Milk
Pour the milk into your saucepan and heat it over medium heat.
Bring milk to 180°F (82°C) to pasteurize it, ensuring that any harmful bacteria are eliminated. This step also leads to a better texture.
According to the National Center for Home Food Preservation, this heating step is necessary to change the protein structure in the milk so it sets as a solid instead of separating.
Cooling
Remove the saucepan from heat and pour milk into your clean ceramic crock-pot insert and let the milk cool to 110°F (43°C).
This temperature is critical as it activates the yogurt culture without killing the beneficial bacteria.
Adding the Yogurt Culture
Once the milk has reached the ideal temperature, add your yogurt culture.
First, remove one cup of the warm milk, and incorporate the yogurt starter into the milk then add it back into the crock-pot.
Stir thoroughly to ensure the culture is evenly distributed, which helps achieve a consistent thickness and flavor.
Incubation
Heat your oven to the lowest temperature. Most ovens range between 170 to 200 degrees. Once indicator sounds, let oven heat for 10 minutes and turn the oven off.
Top your crock-pot insert with its lid. Wrap the crock-pot with a clean large bath towel. Place on a cookie sheet and put into heated oven.
Close oven door and turn on interior light to help maintain heat.
Warming the oven and wrapping the crock-pot in a towel will help maintain the optimal incubation conditions.
Once the oven door is closed, Do Not Open The Door For 24 Hours.
Refrigeration
After the incubation process, place the yogurt in the fridge to stop bacterial activity and allow flavors to develop.
Chill for at least 4 hours or overnight before enjoying your homemade treat.

You can store your yogurt in a large mason jar or any container of choice. Do not store yogurt in a metal container.
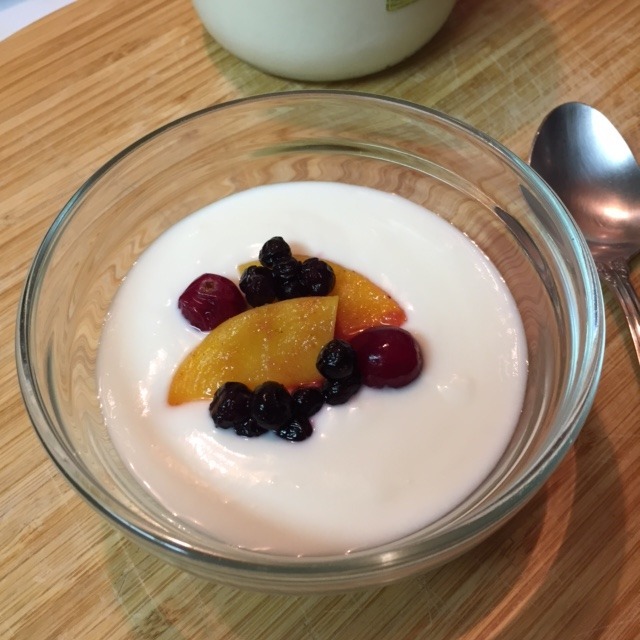
The yogurt has a thin consistency like Yoplait Dannon yogurt.

Top Of Image Is Showing A Store Bought Yogurt And The Bottom Is Showing Out Come Of Homemade Yogurt
If you want a thicker yogurt like Greek yogurt or possibly Bulgarian style yogurt, you need to put the yogurt into a clean cheesecloth and let the whey drip off.
Troubleshooting
Should your yogurt not set properly or taste unusually sour, try adjusting incubation times, ensuring correct temperatures, or experimenting with different yogurt starters.
Making yogurt at home is a simple process that provides healthier and more economic options.
By following these steps, you can customize flavors, create your ideal texture, and enjoy fresh, homemade yogurt.
Additional Tips
Add flavorings such as honey, vanilla, or fruit for personalized taste.

Incorporate nutritious toppings like granola or nuts for added benefits.
With this guide, you’re equipped to make delicious, homemade yogurt. Enjoy the process and experiment to find your perfect recipe.
Use Your Homemade Yogurt With The Following Recipe Suggestions


Make These Homemade Favorites


Craving Something New – Find Your Next Favorite Breakfast, Lunch, Brunch, Side Dish, Soup , Salad, Sandwich, Dinner And Dessert Recipes Here 👉🏽 Recipe Index
More Deliciously Yummy Recipes
- Cooking With Tortellini Pasta: 11 Delicious Ways to Transform This Versatile Ingredient
- Creamy Caramelized Onion Tortellini
- Moist Gluten-Free Almond Flour Strawberry Banana Muffins
- 3 Flavorful and Easy Persian Recipes for Beginners
- Instant Pot Ash Reshteh (Persian Herb, Bean and Noodle Soup)
Please Share With Your Social Network:
Discover more from Cook Plate Fork
Subscribe to get the latest posts sent to your email.